CPA Marketing for Beginners: Complete Step-by-Step Guide
This page contains affiliate links. If you buy through them we may earn a commission at no extra cost to you — it never changes our verdict. How we make money.

Starting a cost-per-action marketing business requires no existing audience, no proprietary product, and no technical development background. Unlike traditional e-commerce or high-ticket sales, cost-per-action campaigns pay affiliates when users complete simple online interactions—such as submitting an email address, filling out a brief questionnaire, or signing up for a free trial. However, bridging the gap between understanding the business model and launching your first profitable promotion demands a disciplined, structured approach.
How do you start CPA marketing with no experience? Beginners can start by selecting a single traffic channel, joining entry-level network affiliate programs, choosing low-friction lead generation offers, and constructing simple pre-landing pages. Success relies on gathering data through systematic initial testing rather than expecting immediate campaign profitability.
To navigate this landscape effectively, you should consult CPA Marketing: The Complete Guide to Cost Per Action (2026) for a broad overview of industry mechanics. This guide provides an actionable, 30-day tactical roadmap tailored specifically for newcomers who need clear directions without hype or unrealistic promises.
Setting Expectations: Realities, Budgets, and Timelines
The most common reason newcomers fail in cost-per-action marketing is misaligned financial and operational expectations. The industry is frequently marketed as a hands-off, automated revenue stream, but the reality involves rigorous testing, data evaluation, and iterative adjustments.
When launching your initial cost-per-action campaign, treat your primary financial allocation not as an investment that must instantly turn a profit, but as an market research expenditure. You are purchasing raw click data from ad networks or search engines to discover which user demographics, device types, and advertising hooks respond to your chosen promotional offer.
Most affiliate marketers lose money on their very first campaign setup. Discovering a profitable offer-and-traffic combination typically takes several iterations, split-tests, and campaign adjustments. Expecting instant revenue from a initial $20 investment leads to premature abandonments before gathering sufficient data to optimize performance.
Realistic Starting Budget Allocations
While free promotional strategies exist, paid traffic accelerates feedback loops, allowing you to optimize campaigns based on real metrics in days rather than months. Below is a realistic budget blueprint designed for a beginner launching their first paid promotional workflow:
| Operational Line Item | Minimum Recommended Allocation | Practical Purpose |
|---|---|---|
| Paid Ad Traffic Initial Test | $150 – $300 | Gathering 300–500 targeted user clicks across a single campaign to assess conversion performance. |
| Campaign Tracker Software | $0 – $40 | Tracking sub-IDs, creative assets, device models, and conversion attribution (using free tiers or basic starter plans). |
| Domain Name & Web Hosting | $15 – $25 | Registering a domain and acquiring lightweight hosting to host simple pre-landing pages. |
| Testing Reserve Buffer | $100 | Capital retained exclusively to scale winning placements or test alternative angles once data confirms conversion viability. |
| Total Estimated Budget | $265 – $465 | A balanced capital reserve allowing for genuine market experimentation without unnecessary financial strain. |
If your budget is severely constrained, exploring free traffic strategies offers a alternative path to generate user engagement without upfront media buy costs, though it demands a substantial commitment of manual effort and content creation.
Step 1: Select One Traffic Source and Matching Vertical
A major operational error made by novice marketers is trying to master multiple promotional channels at once. Splitting focus across Google Search, TikTok video ads, pop traffic, and push notifications guarantees dilute efforts and insufficient data collection on any single platform.
To build momentum, select one sustainable traffic channel and align it directly with a appropriate marketing vertical.
+------------------------------------------------------------------+ | TRAFFIC & VERTICAL PAIRING | +------------------------------------------------------------------+ | Pop / Push Notifications -----> Low-Friction Sweepstakes & | | App Downloads | | | | Search Ads (Google/Bing) -----> High-Intent Lead Gen | | (Insurance, Financial Services)| | | | Social Media Video Platforms ---> Visual Consumer Products & | | Personal Finance Apps | +------------------------------------------------------------------+
Matching Channels to Promotional Categories
Different traffic types carry distinct levels of user intent. Matching your advertising channel to the proper promotional category is essential for maintaining efficient conversion rates:
- Pop and Push Traffic: User intent is lower because ads interrupt active browsing. Pair these platforms with extremely low-friction campaigns, such as single-page email submits, sweepstakes entries, or free mobile application downloads.
- Search Engine Traffic: User intent is exceptionally high because users actively seek solutions. Pair search campaigns with higher-value lead generation, including loan comparisons, home improvement estimates, or insurance quotes.
- Social and Native Media: User intent is discovery-focused. These channels excel when paired with visually compelling products, software platforms, gaming applications, or lifestyle services.
For a detailed evaluation of paid options, read our guide on paid traffic platforms to evaluate which advertising channel fits your current skills and operational budget.
Step 2: Master the Network Application and Screening Process
Joining established network platforms represents a major hurdle for many new marketers. Affiliate networks serve as intermediaries between commercial advertisers and external marketers; consequently, network managers evaluate applicants strictly to prevent fraud, spam compliance violations, and low-quality user traffic.
When searching for flexible cpa networks for beginners, avoid sending vague, unprepared application submissions. Network managers routinely decline applications that lack specific operational details.
+-------------------------------------------------------------------+ | NETWORK APPLICATION WORKFLOW | +-------------------------------------------------------------------+ | 1. Define Specific Strategy (Traffic Channel + Niche) | | 2. Build Professional Digital Presence (Simple Site/Landing Page) | | 3. Submit Detailed Form (Explicitly Outline Budget & Methods) | | 4. Proactively Contact Affiliate Manager (Demonstrate Intent) | | 5. Complete Screening Phone Call / Verification Interview | +-------------------------------------------------------------------+
What to Write on Your Network Application
When filling out a cpa affiliate marketing sign up form, express absolute clarity regarding your proposed promotional strategy. Use clear, professional parameters rather than general claims:
- Traffic Source: Specify precisely where your clicks will originate. Instead of stating “social media and paid ads,” write: “I drive traffic primarily via push notification campaigns on specialized ad platforms, supplemented by targeted search ad groups on Google.”
- Marketing Methodology: Clearly explain how you intend to funnel traffic. Indicate that you route users through custom, compliant pre-landing pages tailored to specific offer angles, ensuring ad alignment and policy adherence.
- Experience Explanation: If you possess no past earning history, avoid fabricating revenue screenshots—network affiliate managers detect false claims quickly. Frame your status accurately: “I am an agile digital marketer transitioning into cost-per-action campaigns. I have allocated a initial monthly media budget of $300 to run push ad tests targeting sweepstakes and utility offers.”
Handling the Phone and Interview Screen
Many top-tier platforms, such as those detailed in our comprehensive MaxBounty review, mandate a phone interview or live chat screening prior to account approval.
Prepare for this conversation by reviewing the platform’s public offer directory in advance. When the affiliate manager contacts you, clearly convey three core facts:
- The exact promotional categories you intend to target immediately.
- The traffic sources and geographical locations you plan to buy media in.
- Your clear understanding of regulatory compliance, including FTC marketing guidelines for disclosures, accessible via the official Federal Trade Commission website.
Proactively reaching out to your assigned account representative via email or messaging platforms right after submitting your online application demonstrates professionalism, substantially improving your chances of swift platform authorization.
To compare platform options, review Best CPA Networks in 2026: How to Choose and Get Approved, which evaluates approval strictness and payment schedules across major industry platforms.
Step 3: Select a Low-Friction CPA Offer
Once authorized by a network platform, novice marketers often drift toward high-paying promotional offers. Promos offering $50 to $150 per completed conversion look lucrative, but they typically require users to complete detailed application processes or enter valid credit card details.
For beginners, high-payout offers present significant strategic challenges:
$$\text{Required Test Capital} = \text{Offer Payout} \times 10 \text{ (to } 20\text{)}$$
Testing a $100 payout offer requires allocating $1,000 to $2,000 just to achieve a statistically meaningful sample of conversion data. Conversely, a low-friction offer paying $2.00 per single opt-in requires only $20 to $40 of testing capital to collect actionable performance indicators.
+-------------------------------------------------------------------+ | OFFER FRICTION VS. RISK SPECTRUM | +-------------------------------------------------------------------+ | [LOW FRICTION] [HIGH FRICTION] | | Payout: $1.50 - $4.00 Payout: $50 - $150+| | Action: Email / Zip Submit Action: Credit Card | | Conversion Rate: High (5% - 15%) Conversion Rate: Low| | Required Test Budget: Low ($30 - $50) Required Budget: High| | Ideal for Beginners Requires Experience | +-------------------------------------------------------------------+
Ideal First Campaign Parameters
Focus on identifying low-friction campaigns within verified cpa affiliate programs for beginners that match the following criteria:
- Conversion Mechanism: Single Opt-In (SOI) or Double Opt-In (DOI) forms where the user merely enters an email address or postal zip code.
- Payout Range: $1.50 to $4.00 per completed action.
- Target Market: Tier-1 geographies (such as the US, UK, CA, or AU) for simple compliance, or Tier-2/Tier-3 geographies (such as LATAM or Southeast Asia) if operating with lower cost-per-click budgets.
- Offer Longevity: Select offers that have run consistently on the network platform for several months, indicating steady advertiser demand and stable conversion infrastructure.
Step 4: Build a High-Converting Prelander
Direct-linking—sending raw advertising clicks directly to the advertiser’s default target page—rarely yields sustainable profit margins in modern cost-per-action marketing. Search engines and paid display networks often reject direct affiliate tracking links outright due to safety and policy constraints. Furthermore, direct traffic rarely possesses sufficient context to convert efficiently on a cold offer landing page.
A bridge page, or prelander, serves as a crucial intermediate web page positioned between your display advertisement and the ultimate offer page.
+----------------+ +-------------------+ +------------------+ | User Clicks | ---> | Simple Prelander | ---> | Advertiser Offer | | Display Ad | | (Builds Context) | | Landing Page | +----------------+ +-------------------+ +------------------+
Essential Elements of a Modern Prelander
A high-converting prelander should be clean, fast-loading, mobile-optimized, and free of extraneous navigation options. Structurally, it relies on four key components:
- Hook Headline: Directly echo the exact message, angle, or promise displayed on your primary advertising banner to preserve seamless message match.
- Concise Value Proposition: Present three bullet points highlighting the immediate benefit of taking action (e.g., claiming a digital reward, requesting an insurance quote, or testing a software demo).
- Social Proof Callout: Integrate short, authentic-looking testimonial quotes or user activity counters to validate social consensus.
- Prominent Call-to-Action (CTA): Utilize a high-visibility, full-width button carrying explicit action text, such as “Check Eligibility Now” or “Claim Your Digital Pass.”
When configuring your hosting environment, optimize images and minimize external code scripts. Every additional second of loading speed page delay degrades visitor retention by up to 20%. To review exact layout structures, explore our dedicated framework guide on CPA landing pages.
Step 5: Run Your First Test (The 200–500 Click Rule)
After configuring your traffic platform, pre-landing page, and network tracking link, you are ready to initiate traffic delivery. The primary operational objective during this phase is gathering sufficient data to guide adjustments, rather than assessing immediate campaign profitability.
To draw accurate conclusions about creative performance or offer conversion efficiency, run your ads until you accumulate between 200 and 500 unique outbound user clicks on your prelander CTA before making structural campaign alterations.
+-------------------------------------------------------------------+ | THE 200-500 CLICK TEST RULE | +-------------------------------------------------------------------+ | 0 - 100 Clicks : Insufficient Data (Do NOT modify settings) | | 200 - 300 Clicks : Initial Patterns Emerge (Identify Zero-converters)| | 300 - 500 Clicks : Statistically Valid Sample (Prune & Optimize) | +-------------------------------------------------------------------+
Reading Campaign Analytics Correctly
Evaluate performance using a systematic data interpretation process:
- Prelander Click-Through Rate (CTR): Measures the percentage of visitors landing on your bridge page who click through to the offer. Aim for a prelander CTR between 20% and 40%. A CTR below 15% indicates weak offer alignment or an uncompelling headline hook.
- Offer Conversion Rate (CR): Measures the percentage of prelander click-throughs that successfully complete the required advertiser action. For low-friction email submits, target a conversion rate between 8% and 15%.
- Placement Segmentation: Filter campaign reporting by device operating system, browser model, publisher placement ID, and hour of day. Often, a globally unprofitable campaign harbors specific profitable sub-segments (e.g., Android mobile devices running Chrome) hidden beneath poorly performing placement sources (e.g., desktop browser placements).
Isolate performance parameters by disabling non-converting placement IDs, reallocating test funds toward top-performing segments, and testing secondary prelander headlines to systematically reduce your overall acquisition costs. For additional details on structures, refer to our reference guide on CPA campaign structure.
Common Beginner Traps and Software Realities
Navigating entry-level cost-per-action marketing requires avoiding pervasive industry traps that consume testing budgets and stall progress:
1. The “Push-Button Automation” Trap
Novice marketers often fall for automated sales materials claiming secret software can instantly generate daily profits without manual setup or campaign testing. In reality, software tools can assist in page building, campaign tracking, and ad creation, but they cannot replace campaign testing and data analysis.
For example, commercial operational toolkits like those evaluated in our full CommissionOS review offer helpful launch templates and campaign assets. However, software platforms are structural aids—they cannot bypass the core requirement of testing real ad campaigns with real traffic sources.
2. Over-Optimizing Prematurely
Modifying campaign parameters after receiving only 15 or 20 impressions is a common mistake. Making changes to ad creative, landing page headlines, or target demographics too early destroys data integrity. Allow campaigns to run uninterrupted until statistical sample sizes are reached.
3. Spreading Testing Capital Across Multiple Offers
Distributing a modest $100 testing budget across five different offers yields roughly $20 per test—an insufficient amount to gather meaningful conversion data on any single offer. Concentrate your total testing budget on a single offer-and-traffic combination until you compile definitive metrics.
Step-by-Step 30-Day Execution Plan
To build a structured path toward your goal to make money from cpa, follow this organized 30-day implementation calendar:
+-------------------------------------------------------------------+ | 30-DAY EXECUTION TIMELINE | +-------------------------------------------------------------------+ | WEEK 1: Foundation & Approval | | - Select primary traffic channel | | - Apply to 2 beginner-friendly CPA networks | | | | WEEK 2: Offer Selection & Prelander Assembly | | - Select low-friction SOI/DOI offer | | - Build and host simple, responsive prelander | | | | WEEK 3: Data Gathering Campaign | | - Launch paid campaign with designated test budget | | - Accumulate 200-500 clicks without manual interruption | | | | WEEK 4: Analysis, Pruning, and Iteration | | - Analyze placement ID metrics and CTR percentages | | - Cut non-converting sources; reallocate budget | +-------------------------------------------------------------------+
-
Days 1–7: Infrastructure Setup and Approval
- Select your single traffic source (e.g., push notification ads).
- Set up a clean domain name and fast web hosting environment.
- Submit account applications to beginner-friendly platforms using detailed traffic outlines.
- Review our roadmap in A Realistic 7-Day CPA Marketing Action Plan to organize your preliminary technical requirements.
-
Days 8–14: Offer Selection and Campaign Assembly
- Once network access is approved, select a low-friction single opt-in offer paying between $1.50 and $3.50.
- Construct a simple prelander containing a clear hook, benefit bullet points, and a prominent call-to-action button.
- Configure conversion tracking parameters to verify that clicks and postback events record properly between platforms.
-
Days 15–22: Campaign Launch and Data Acquisition
- Launch your ad campaign using an initial daily testing budget ($15 to $20/day).
- Let the campaign run without altering settings until it reaches the critical threshold of 200 to 500 unique click-throughs.
-
Days 23–30: Performance Analysis and Optimization
- Export performance logs and evaluate conversions across device models, creative variations, and placement sub-IDs.
- Blacklist low-performing placement IDs that spend testing capital without generating user conversions.
- Double down on profitable segments and test a secondary prelander variation to continuously improve conversion rates.
Technical Setup: Mastering Server-to-Server (S2S) Postback Tracking
Relying on traditional client-side tracking pixels is no longer sufficient for modern CPA marketing. With browser privacy updates, cookie restrictions, and ad-blocking software becoming widespread, client-side scripts frequently fail to record completed conversions. To ensure accurate data attribution across your campaigns, you must implement Server-to-Server (S2S) postback tracking before launching paid traffic.
S2S tracking operates entirely on the server level, bypassing the user’s web browser. When a user clicks your advertisement, your tracking software generates a unique identifier—typically referred to as a Click ID—and appends it to your destination URL. When the user transitions from your landing page to the offer page on networks such as MaxBounty, CPAGrip, or AdCombo, this unique identifier is passed directly to the affiliate network’s database.
Once the visitor completes the required action, the network’s server automatically triggers a silent HTTP request—the postback URL—back to your tracking platform, matching the unique Click ID to register the conversion and payout value.
A frequent error among beginner affiliates is misconfiguring token syntax during this technical handshake. Every CPA network and tracking platform utilises distinct parameter names. For instance, passing {clickid} when the receiving network requires {sub_id} will break data transmission, resulting in untracked conversions despite actual offer completions.
To ensure your infrastructure functions correctly before running paid campaigns:
- Utilise your tracking tool’s built-in network templates, which usually standardise parameter tags for major networks like CPABuild or CPALead.
- Request a dummy test conversion or conversion URL validation from your network affiliate manager.
- Inspect your tracker’s postback logs to confirm that outgoing Click IDs match incoming postback calls.
Establishing robust S2S attribution ensures your reporting remains precise, allowing you to analyse campaign profitability and optimise ad spend with confidence.
Landing Page Compliance: Protecting Your Accounts and Payouts
When launching your first campaigns, it is tempting to focus entirely on optimising conversion rates while ignoring compliance requirements. However, failing to align your prelanders and ad creative with regulatory standards and traffic source policies is one of the fastest ways to suffer ad account bans or have commissions withheld by CPA networks such as MaxBounty or AdCombo.
Modern advertising networks and consumer protection bodies, including the Advertising Standards Authority (ASA) in the UK and the Federal Trade Commission (FTC) in the United States, enforce strict rules regarding advertising transparency and deceptive marketing. Beginners frequently encounter compliance issues by using aggressive tactics that trigger automated compliance bots or manual network audits.
To safeguard your campaigns, implement the following essential compliance measures:
- Mandatory Affiliate Disclosures: Always inform visitors that you may receive financial compensation if they complete an action through your link. A clear, readable statement placed in the page footer or near the main call-to-action button ensures compliance with major ad network guidelines.
- Required Legal Documents: Ensure every prelander includes functional links to a Privacy Policy, Terms of Service, and Contact Details. Traffic networks typically scan landing pages for these documents before approving ad campaigns.
- Eliminating Deceptive Urgency: Avoid hardcoded countdown timers that reset on page refresh, fake stock counters, or unauthorised celebrity endorsements. CPA networks generally classify these as misleading practices, which can result in reversed conversions or account termination.
- Strict Adherence to Offer Restrictions: Carefully review the traffic restrictions listed in your affiliate dashboard. If an offer strictly prohibits incentivised traffic, specific geographic regions, or search brand bidding, attempting to bypass these constraints will almost certainly lead to non-payment.
Prioritising compliance may slightly reduce raw click-through rates compared to aggressive, deceptive angles, but it protects your ad accounts, ensures steady payouts, and builds a sustainable affiliate marketing operation.
Summary Action Checklist
Building a sustainable business around cost-per-action campaigns requires structured execution, continuous optimization, and objective data analysis. Success depends on following a systematic process: select a single traffic channel, secure entry-level network approvals through clear applications, select low-friction lead generation offers, build simple pre-landing pages, and let campaign data guide your optimizations.
Begin by selecting your primary traffic channel today, securing network authorization, and executing your initial 300-click test campaign with complete discipline.

Related guides
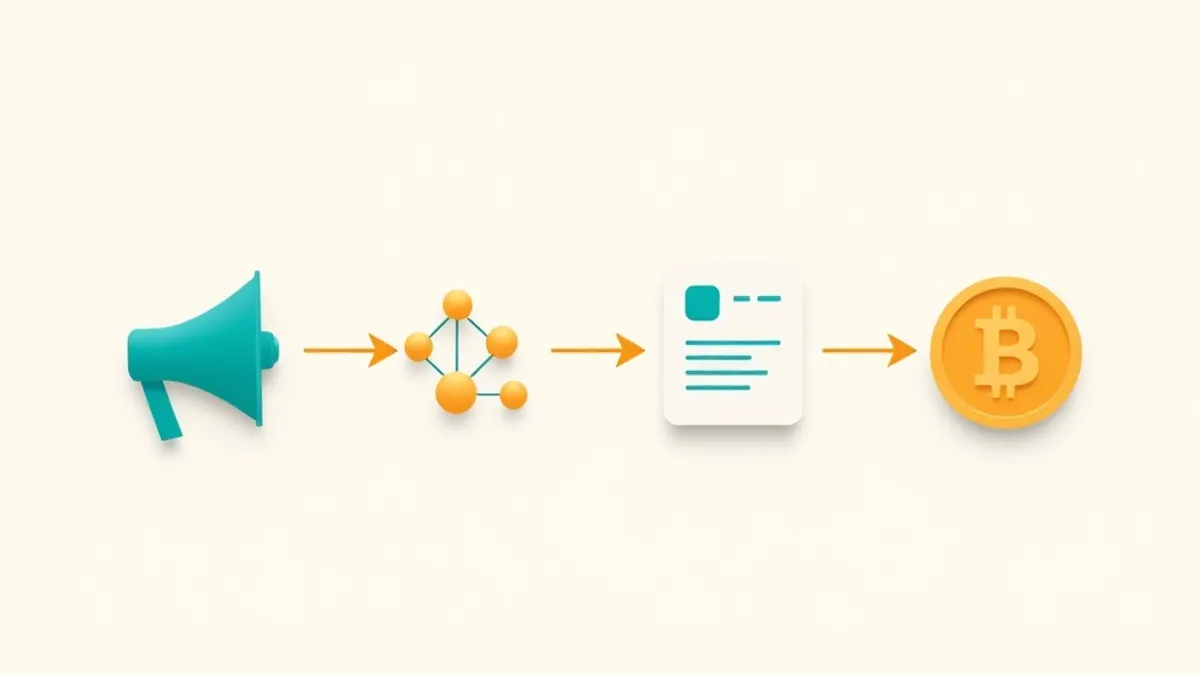
CPA Marketing: Complete Guide to Cost Per Action (2026)
Discover how CPA marketing works end-to-end, from offer selection and campaign anatomy to tracking, payouts, and compliance in this 2026 pillar guide.
Best CPA Networks in 2026: How to Choose and Get Approved
Compare the best CPA networks in 2026, discover high-converting offer verticals, and learn the exact step-by-step process to pass network approval calls.

A Realistic 7-Day CPA Marketing Action Plan
Follow this realistic 7-day CPA marketing action plan to pick offers, build prelanders, set up tracking, and launch your first cost-per-action campaign.